2 days ago
My Steam Flan
Sunday, September 18, 2011
Flan is one of those desserts that come in many shape, size and texture from all over the world. In fact, after some intense searched for the best recipe possible, I noticed that there are many versions to that claimed to be the “original” recipes. I am so sure of this, that I know most family have their own version too that is the original. Of all the recipe, the one I found most intriguing is the one that I had at this Chinese Buffer near my house. It was so rich and creamy, yet just the perfect hint of sweetness that just melts in your mouth and longing for more and more and more. You get the picture. Therefore, that might have been the reason why I never really want to make my own version, for fear of overindulgence!
Now all that changes when my mom came over and told me that she and my sister love this creamy dessert, but can’t seem to get it right. So liking a challenge and thinking that this is just such an easy dessert to make, I went ahead and research for some recipe try my own version. The one that I seem to taking a liking to was the one by Kiss My Spatula. I like that she steamed it instead of baking it and that she didn’t used any condense milk. I had other flan that used too much condense milk that all you taste was the intense sweetness from it that it left a bitterness aftertaste. Too sweet for my taste! Although, I don’t really want to use too much condense milk, but I do like their caramel flavor it brings to dessert so I had added a spoonful of it and it turn out great. Also noticed that I used heavy whipping cream instead of evaporated milk, due to the reason I really like creme brulee extreme creaminess texture. So far this is the best hybrid flan recipe I ever had! It look like flan and last so much like crème brulee..love it! Love it! Found my new love affair…and this one for my sisters..
Ingredients:
Caramel Sauce:
1 Cup sugar
1 Tbsp of ready- made caramel ice cream sauce (optional if you like that intense caramel flavor and thickness)
Flan
1 Cup Milk
1 Cup heavy whipping cream
1 TBSP of condense milk
1/3 Cup sugar
3 Eggs
2 Egg yolks
1Tsp vanilla extract
Methods:
1. Add some water to your steamer and turn it on to warm it up.
2. In a sauce pan, on medium heat, melt the sugar. Do not stir, just sit and watch until it melt completely and golden. Remove from heat and pour into prefer glass dish and make sure to coat the bottom completely.
3. In another sauce pan, heat the milk, heavy cream, condense milk and sugar. Stir until completely blend. Bring milk to hot. Remove from heat and set aside.
4. Beat the eggs and yolk and vanilla extract together until blend. When the milk is slightly cool, whip in the eggs and blend well. Remove any forms or lumps.
5. Pour the blended mixture into the glass bowl and place in the steam and steam for 15 minutes.
6. Remove and let it cool down before refrigerating it overnight.
Taiwanese Beef Noodle Soup
Thursday, July 28, 2011
As I mention earlier in my post, we don’t really have a real Asian market here. The closest one would be in Dallas about 5 to 6 hours drive, so the motivation to cook can be pretty limited too. That had recently changed since our little town finally had a real Chinese/Oriental Market. I was the first to check it out! Yes, that how excited I was. So as I was grabbing everything to put into my basket, I made my way to the cooler section and noticed the Taiwanese noodle. I nearly jumped for joy! I knew right away that I will make it this coming Sunday.
In all honestly, I never had this since I moved to Texas 5 years ago and just thinking about it made my mouth water. The blend of spices with the hot soup and oh so tender beef just compliments the chewy hands pulled noodle to perfection. This noodle soup is so soothing and delicious that it hard to any other noodle to compete with. It one of those noodle that once you have it, you’ll crave for more and more.
3 Pounds of beef shank cut into 2” inches pieces
5-6 Garlic cloves, slightly crushed
1 Tbsp vegetable oil
1 Tbsp sesame oil
3 Sliced gingers
5 Slightly crushed scallion, cut halved crosswise
1 Tsp Chinese five-spice powder
4 Star anise
½ Tsp of white pepper
1 Tbsp of beef soup base
½ Tsp of black pepper
1 Tsp of sea salt
4 Dried chilies
¼ Cup chile bean sauce
3 Tbsp of Shaoxing rice wine
2 Tbsp of rock sugar
½ Cup of soy sauce
3 Tbsp of dark soy sauce (add more for darker broth)
5 plus Quart of water
1 Bunch water crest or baby bok choy, broccoli flower
2 Package fresh hand pull Taiwanese noodle (find it in your Asian market)
1. Put all the ingredients together and bring to a hard boil.
2. Remove any scum on the top to make the soup clear.
3. Lower the heat to medium and cook for another 1 ½ hours or until beef shank is tender. If you put tendon in there cook the tendon ½ first.
4. When it done do not cover and let it sit for a couple of hours to fully absorb the flavor. Or make it overnight and refrigerated.
5. To serve, in another pot add water to almost full and bring it to boil. Cook noodle to package instruction.
6. Drain and add the vegetable and soup.
Enjoy.
My Steam Chinese Sponge Cake Dan Gao
Sunday, July 24, 2011
This steam Dan Gao or sponge cake is often present itself during the Chinese New Year festival with a red dot on the center. It always the first item I want to eat before anything else. I can’t put my finger on it, but it has a uniqueness that only childhood memories could make you appreciated this cake even more so. It not like your average baked sponge cake. It one more dense and less airy, yet it have it own distinctive taste that just melts in your mouth. I can really eat this cake all day long! Of course it being steam is doesn’t make it less fat content, even though it tasted lighter. Everything is moderation is always best.
Beside the paper cup sponge cake, this is one of my favorite cakes that I often buy when I do happen to go to Hong Kong bakery in Torrance. They make this cake nice and moist and right out of the steamer every time I order them. If you really want to try this out, I know that some Dim Sum place do serve this tasty treat. So next time if you do see it, don’t hesitate to try some!
Ingredients:
3 Cup of cake flour
½ Tsp of baking powder
½ Tsp of almond extract or prefer flavor
½ Tsp of butter/vanilla emulsion
6eggs
1 Cup of granulated sugar
Methods:
1 Put half of water in the steamer and bring to a slow boil.
2 Shift the flour and baking powder together and set aside.
3 In a mixer whip the egg until creamy and then add the sugar, butter/vanilla emulsion and almond extract.
4 When the egg turns pale yellow and double in volume. Slowly add the flower and mix well.
5 Pour the batter into a grease baking pan of desire size and put over hot boiling steamer.
6 Steam for 45 minutes or until the pick comes out clean when poke in the center.
Let cool and serve plain or with fruit topping.
Chendol
Sunday, July 17, 2011
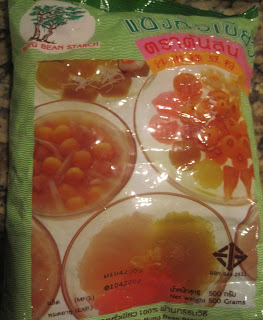
I been looking for the recipe for some time now. Chendol is another form of Lod Chong, just a slight difference in texture and much chewier. There are many name for it, but the one I am familiar with is the Thai’s version known as Singapore Lod Chong, using topical starch or mung bean starch instead of the regular rice flour with lime stone water. In Cambodian lotus root starch is their main ingredient. I know that Vietnamese have the same dessert that they put in their rainbow color drink, and I am assuming that they used tropical starch due to it super chewy, clear texture. In all, I think this dessert is awesome in each and every form. I just love the chewy texture combination with creamy coconut flavor that sweet and salty. It just hits the spot for my sweet tooth craving every single time. This refreshing sweetness it great on serve on shave ice, in a coconut milk drink or just alone with drench in coconut milk syrup, you’ll never just have one serving!
Here what I found out after many experiments with the different kind of starch:
Mung bean starch makes it more bouncy and less chewy.
Lotus root starch soft and chewy, almost melt in your melt texture.
Topical starch is very chewy and almost little or no bounce. Have to chew long before digesting.
Ingredients:
1 Cup starch
3 cup water for lotus starch and 3 ½ cup water for the mung bean flour
1 to 2 drops of pandans extract for flavoring and green coloring
Coconut Milk Syrup
1 Can coconut milk
¾ Cup of palm sugar
½ Tsp of salt
Over medium heat add everything and bring to boil. Add the sugar a little at a time taste. Turn off and set aside.
Methods:
1. Mix the water and the flour until blended.
2. Heat over medium heat and stir constantly.
3. When it starting to clump up, lower the heat to low and continue stirring in one direction to keep the consistency going.
4. It is done when it is sticky, shiny and clear. That about a good 15 minutes of stirring.
5. Remove from heat and pour into the lod chong presser. Making sure that the presser is only ½ above ice water.
6. Let it sit in the water for a good 10 minutes then remove and serve with the coconut milk, with or without ice.
Beef Kabob
Friday, May 27, 2011
For this Easter I forgo the traditional ham, lamp and turkey dinner for something that is exotic and closer to home and less complicated. So I decided to do an Asian B.B.Q. with beef and chicken kabob with all the dressing and herbs Khmer style. I grew up loving this beef stick because of it rich tasting and powerful aroma. There is no other beef kabob that can match it in taste or texture and I’ve tried many. Overall, if you into spices and herbs this is one dish you got try at least once. This is one of those dishes that can be used for multi-purposes. I made both chicken and beef with the same marination, but somehow the beef more flavorful and tender. It's great as sandwich meat, as an appetizer or even as the main dishes, whichever way it is just oh so good! Of course I used it as my main dish accompany by papaya salad and a couple of desserts. Simple yet very delicious and interesting to taste bud and everyone seem to love it too. I didn’t have any leftover for this Easter!
Ingredients:
1 Cup minced lemon grass
3 Dried chilies (soak in hot water for an hour until soften)
1 Tsp of turmeric powder
2 Tbsp of oyster sauce
2 Tbsp of fish sauce
¼ Tsp of kosher salt
¼ Cup kaffier lime leave minced
4 Garlic cloves
¼ Cup of coconut milk
2 Tbsp of vegetable oil
1 Tbsp of palm sugar or brown sugar
2 LB beef skirt
Methods:
1. Cut the beef skirt against the grain about 2 inchs long. Set aside.
2. Put all of the ingredients in the food processor and grind to fine.
3. Once it finely grinded poured the puree over the meat and let is sit for at least 6 hours or overnight for great flavor.
4. Soak the skewer in water for 30 minutes before you kabob them.
5. Cook beef for 5 minutes flipping every 2 minutes. For chicken kabob cook for 10 minutes or until done.
Banana Cream Pie
If you love banana cream pie, but don’t want to make one because is just seem so complicated, then you need to try this recipe. This is an easy as pie recipe that can’t go wrong, yet taste so good. For some reason I can never resist banana cream pie! I have tried many versions of banana cream pies and they are all delicious. This is one pie that you can’t really go wrong making or eating! The creaminess of the whip cream combined with banana is oh so perfection that just melt in your mouth….and with some chocolate syrup, you got yourself a perfect crowd pleaser!
Filling
1 Pkg banana flavor pudding
4 Bananas slice thinly
Topping
2 Cup heavy cream
½ Tsp vanilla extract
1/2 Cup powder sugar
Chocolate syrup drizzle on top (optional)
Pie Crust
3 Cups graham cracker crumbs
1 Stick unsalted butter, melted
1. Prepare crust by mixing the graham cracker crumbs, sugar and butter.
Mix thoroughly. And press the mixture into a 9 inch pie pan to form crust.
2. Then prepare the pudding according to instruction, place in the refrigerator to thicken and set.
3. Now mix heavy whipping cream on high speed, slowly adding in the vanilla extract and sugar. Mix until stiff.
4. Carefully pour the pudding on the pie crust little at time. Neatly place the sliced bananas on top of the pudding layer by layer until it all used up.
5. Pour the whip cream into a piping bag, using the big star shape tip and pipe the whipping cream to top the pie off. Play and be creative and make your own design. Have fun.
6. Now put in the refrigerator for a couple hours to set it.
7. Cut into slice serve. For a little kick drizzle with chocolate syrup. There just something so irresistible about the combination of chocolate and banana!
Mung Bean Pudding Dessert
Monday, January 31, 2011
Here another one of the simply yet satisfying your sweet tooth dessert. There not much to this dessert recipe. It is as simple as it gets and taste as good as it should. Yet it one of the most sorts after dessert by most Asian home. I guess the mung bean is supposed to be good for you that it gives a cooling effect to the body. Whatever the reasons are, I just simply can never resist the sticky, gooey texture of this dessert where the combination of the mung bean, sugar and creamy coconut milk just melts in your mouth and satisfying your sugar craving. Of course, there not many versions out there only the thickness that is different. I like mine very thick and gooey with lots of the delicious sweet and salty coconut cream on top of it. I got to admit that the best version that I ever had was the one at this Vietnamese dessert shop on Westminster street somewhere in Westminster, California if I remember correctly. This place makes the best dessert ever! When you walk in there you can smell the sweet aroma of all the dessert and the coconut cream. I just love the thickness of how they make it there and coconut milk is to die for! If you ever happen to be in that area, it a must stop..
Ingredients:
1 Cup of hulled yellow split mung beans (soak in cold water overnight)
4 Cups of water
1 Cup of sugar
2 Tbsp of tapioca starch 3 tbsp of cold water mix together
Coconut Milk Topping
1 Cup of coconut milk
1/2 Tsp of salt
3 Tbsp of sugar
½ Tsp of tapioca starch 1 tbsp of cold water mix together
Methods:
1. Using a steamer, line with cheese cloth and pour the soaked mung bean into it. Make a circle in the middle to have the steam distribute evenly. Cook for a good 25 minutes or until cook. Make sure do not over cook it or it will fall apart.
2. In a pot add the water and sugar and bring it to boil. Stir in the tapioca liquid and stir constantly to prevent burning the bottom of the pot. When it thicken and clear add the cook mung bean and stir lightly to mix.
3. In another small pot heat the coconut milk, sugar and salt to boil. Then add the tapioca liquid in it and stir until it thicken.
Serve hot with coconut milk topping. Great with Chinese’s donut Yao Tiew too!
Sweet & Sour Spareribs
Here a dish that really gets your mouth water just by looking at it. I don’t know what it is, maybe it the coloring or the caramel looking glaze, but it does make you just want to dig in. It doesn’t help that it totally delicious too! Now I for one don’t really care for anything sweet & sour and I was very reluctant about making this one, but alas the picture just makes my mouth water and I gave in. The best part about this recipe it that it not your typical sweet & sour ribs that in the Chinese take out. This one is restaurant style where it is deep fried first to give it that crispy outside and moist and tender inside.
As mention before, in my house we don’t really care for sweet & sour, but this dish really convince them otherwise. They really clean this dish clean! So if you really into sweet & sour or ribs give this recipe a try….you might just love it!
Ingredients:
3 Tbsp soy sauce
2 Tbsp rice wine
3 Tbsp sugar
2 Tbsp of vinegar
A couple dash of black pepper
1 Tbsp of sesame oil
2 Tbsp of water
½ Tsp of corn starch added about 2 Tbsp of water to it.
Vegetable oil for deep frying
1 Drop of red food coloring or ½ of dark soy sauce (dark soy sauce makes it brown and red makes it red coloring)
Methods:
1. Marinate with the soy sauce and rice wine overnight so that the flavor can set in.
2. The next day take the rib out and place enough vegetable oil and heat to hot. Cook the ribs for about a good 10 minutes or until golden brown and fully cooked. Remove and set aside.
3. In another wok or skillet pour the soy sauce, dark soy, sesame oil, sugar, vinegar and bring to boil and slightly thicken.
4. Now add the ribs and give it a couple of tosses to fully absorb the flavor.
5. Lastly, add the corn starch water and give it a couple more tosses until liquid is fully absorbed and thicken. Give the black pepper a couple of shake and toss once or twice.
Serve hot.
Stir Fried Herbs Chicken
Sunday, January 30, 2011
This is a favorite among many Southeastern Asian for it many herbs and ingredients. What interesting about this dish is that the combination of the herbs aroma makes you just wants to chow down more than you desire potion. Although it not hard to make, but if you making the herbs from scratch and using your hands it can be tiring and time consuming. The easiest way is to buy the ready minced lemongrass and using an electric blender. It works and it time and life saving! Of course, everyone will have their version of this dish. Even the restaurants added their own flavor to it. Here my version. Enjoy making it and eating it!
Ingredients:
6 Stalks of lemon grass sliced to it thinnest possible. Or ½ cup of ready minced version.
1 Lb Chicken wings or drumstick clean and cutting into 2” sizes. It taste best when use part with bone in them.
4 Cloves of garlic
I Thumb size turmeric or ½ Tsp of powder version
1 Handful of kaffir lime leaves
4 or 5 Thai chilies pounded to open
3 to 4 Jalapeno sliced
1 Tbsp oyster sauce
1 Large onion cut into four
1 Handful of holy basil
1 Tbsp of vegetable oil
2 Tbsp of fish sauce
½ Tsp of dark soy sauce
A couple pinches of kosher salt or to taste
Methods:
1. Combine all the lemongrass, kaffir lime leaves and pulse for 4 times or until blend. Sometime adding a little water makes it easier to blend. When it minced and blend thoroughly add the garlic and turmeric and pulse 3 more time.
2. Heat a nonstick pan to hot and add the oil. When oil it hot add the herbs mixture and Thai chilies and stir until aroma.
3. Add the chicken pieces and stir in the fish sauce, salt, oyster sauce and dark soy. Stir occasionally so the chicken will not be burnt on one side.
4. When the chicken it fully cooked, usually a good 20 minutes or so add the jalapeno and onion and stir for another 5 minutes.
5. Turn off the heat and add the holy basil and give it a couple of tosses.
Serve hot with fresh steam rice.
Fish Cake
If you love fish cake, here a good one for you! Fish cake is often consider as an appetizer because it on that section in all of the Thai restaurant, but in reality it is also great as the main dish with rice too or that how I often eat it. A good fish cake should have the following characteristic, crispy on the outside and moist and chewy in the inside, just the way I think every fish cake should be. Of course, this is not a hard dish to make, but if not done right it just tasted like rubber! And believe me I had some of those before! It was very hard to swallow it, let alone enjoy it. So here my famous version, by famous I meant with the family wise. They just ravish this dish and rave about it. A big smile is the way to a chef heart as I always say…..
Ingredients:
1 Package of fish paste
2 Tbsp of red curry paste
1 Tsp of paprika
1 Tbsp of fish sauce
2 Tbsp of tapioca starch
1 Cup of Asian green bean cut into small pieces (optional)
Handful of kaffir lime leaves sliced into thin pieces
¼ Vegetable oil for frying
Cucumber sauce or salad
1 Cucumber thinly sliced
2 Tbsp of white vinegar
1 Tbsp of sugar
Mix together set aside. Great with fish cake and satay alike.
Methods:
1. Using electric blender add the fish paste, curry paste, fish sauce, paprika and tapioca starch and pulse 3 to four time or until fully blended.
2. Scope it out and add the lime leaves and cut green bean and mix well.
3. In a frying pan add the oil and bring to hot.
4. Rubbing a little oil on your hands, scope a spoonful of the fish paste mixture into your hand and roll it into a ball. Then flatten it with your palms to about ¼ to ½ inches in thicken.
5. Drop the fish paste into the hot oil and cook until golden brown. Make sure to turn it over so that it will not get burn.
Serve hot with cucumber sauce and with steam or sticky rice.
Thai Beef Jerky (Nua Sawan)
Wednesday, January 26, 2011
This is the perfect take snack for every occasion. You can never have enough of this, especially when it served with sticky rice and the tangy garlic vinegar sauce. This is one of the must have dish everything I do eat Thai food, because it just tasted so good with freshly cooked steam rich or sticky rice! Of course there the hardcore beer drinking that loves this as their finger snack.
Unlike the our American’s beef jerky where you just bit into it, this one you have to pull it in strand and it taste just heavenly this way. Great snack for on the go when you need to have pack some light food on a road trip.
Ingredients:
2 Pound of beef (using the chewing type such as chuck roast, beef sirloin) cut to long strip about 2” wide
2 Tbsp of minced garlic
3 Tbsp fish sauce
1 Tbsp of sugar
1 Tbsp of rice wine
½ Tsp of salt
1 Tbsp of black pepper
½ Tsp white pepper
1 Tbsp oyster sauce
Sauce:
1 Tbsp of sugar
2 Tbsp of white vinegar
2 Cloves of minced garlic
Mix and you have a sauce!
Methods:
1. Place the beef in a metal bowl and add the rest of the ingredients, fish sauce, salt, black pepper, white pepper and oyster sauce.
2. Message it thoroughly for a minute or so.
3. Now cover it up and refrigerated it overnight.
4. The next day, set your over to lowest setting possible and place the beef on top of a rack and keeping the oven door ajar and let it sit for 2 to 4 hours. Another option is to sun dried it if you have the right cover up and netting.
5. When it dry you can freeze the rest that not use.
6. To cook this just
7. heat enough hot to hot and cook for 5 minutes. Do not over cook or it will be burnt. After remove from the oil. Towel dry and slightly pound it so that it will be tender and not to hard when it cold.
Best serve hot. When it cold it tend to be teeth breaking and lost it true flavor.
Vegetarian Pad Thai
Ok here a very popular dish that you will see in every Thai restaurant. There something about this noodle that everyone just can’t seem to resist. With it sweet and tangy flavor and chewy noodle texture accompany with eggs and tofu just melts in your mouth. Of course, when not done right it is tasteless and dry, tasting more like dried cardboard than noodle. I am not a sweet main dish person, but this noodle caught my attention once upon a time when my chef first cook it for me at my once upon time Thai restaurant. The way he made it was makes the noodle look so tempting all glossy and moist. Of course, after one bite, I was hooked on Pad Thai! And the long process of pestering him to finally teach me how to make and what is his secret ingredients. Needless to say, if he is reading this he won’t be too happy that I am leaking his secret ingredients out! But you know what they say about sharing is caring…and I am sure he wants his wonderful recipe to be acknowledged and enjoy by other Pad Thai lover out there! Whoever you guys are….
Ingredients:
1 Serving or ¼ package of medium size fresh or dried rice noodle
2 Tbsp of Pad Thai sauce
1 Tbsp of fish sauce
1 or 2 Eggs (optional)
1 Handful of bean sprout
2 Tbsp of cold water
½ Cup of hard tofu cut into 1/2 inch cubes
½ Tsp chopped cooked peanuts
3 Steams of cilantro
A couple dash of white pepper
1 Tbsp of vegetable oil
Pad Thai’s Sauce
1 Package of ready peel tamarind paste
1 Cup of sugar
½ Cup of Sambal Oelek fresh ground chili paste (find it in sauce section in Asian market)
2 Cup of boiling water
• Bring the water to boil. Pour the water on the tamarind paste and let it sit for 30 minute or so.
• After the required time, it should soften and fall the tamarind will fall apart.
• Now using a spoon or hand mash the tamarind until it thicken and strain it through a strainer to remove all skin and seed.
• In a medium pot, pour the tamarind juice, sugar and chili paste and bring to boil.
• When it boiled lower the heat to medium and stir occasionally until the sauce is thicken.
• When it done you can put it in a plastic container and or seal tight and refrigerate it for up to 6 months.
Methods:
1. If you’re using dried noodle, make sure to soak it for 1 hour first then soak it boiling water for 30 seconds or so to soften the noodle up. Fresh one can be cook right away or if you like it softer soak in boil like the dried noodle. Do not soak in boiling too long or the noodle will break apart and gets mushy when cooking it.
2. Heat wok to hot, than add the vegetable oil. When the oil is hot add the tofu and cook until light golden brown.
3. Move the tofu aside, add the eggs and scramble it until cook.
4. Add the noodle, fish sauce, water and Pad Thai’s sauce and toss the noodle until fully mix together and the sauce is coating the noodle all over. Do not over stir it or it will break apart.
5. When it fully cooked add the cilantro and white pepper and give it a toss or two. If you like your bean sprout to be cook add it now.
Remove, add the peanut, cilantro and bean sprout, serve hot.
Lod Chong
Tuesday, January 25, 2011
Love..love!! This particular dessert more than I can explained. The funny thing is that it not even chewy! And we all know how much I love anything with a chewy texture. Although it lack the chewy texture, but it deliver in other areas to makes you just fall in love with it, such as the soften of short noodle like strains that just slip through your mouth and down your throat, just leaving the creamy coconut milk sweet linger and yearning for more. Come to think of it, the reason that I love eating this thoroughly satisfying dessert, because of the memories that goes with it. I will always remember the first time eating it in Cambodia from a street vendor. My grandmother bought me my first bowl and that was the sweetest most precious things I ever taste after many years in starvation and away from modern civilization (actually survived the killing field). So this one dessert brought back so many heartwarming memories.
This is the one dessert that you will only see at private gathering such as birthday, New Year or special occasion, because it is time consuming to make and very intimidating for those that never made it before. So if you happen to stumble upon this dessert as a house guest, consider yourself lucky…because you must be special!
The pandanus squeeze* Note: Adding tapioca flour gives the texture of slight tougher taste, without makes it softer and just the right soft and slight chewy texture.
Ingredients:
1 Cup of rice flour
3 ½ Cups of red limestone water
1 Tsp of pandanus squeeze
½ Tsp of pandanus liquid flavor
¾ Cup of palm sugar
2 Tsp of tapioca starch mix with 2 Tbsp of cold water
1 Can of coconut milk
¼ Tsp of salt
Methods:
1. Use ½ canister of red limestone and add 7 cups of water. Let it sit overnight.
2. Before you do anything get some ice and put in bucket with cold water.
3. Next day take the half of that water 3 ½ cups and pour through a cheese cloth and into a non stick pot.
4. Now add the rice flour, tapioca starch, pandanus flavor and squeeze and knead with wooden spoon until it fully mixed together into liquid form.
5. Over medium heat, place the pot and stir continuously.
6. When the batter turn bright green, thicken and almost glossy looking it done. The texture when you pick up the spoon should run like the gooey slime. About 25 to 30 minutes.
7. Placing the salim’s presser only 2” inches about the ice water, gently and slowly pour the batter into it little at time. Now give it a hard but short press. Once the batter hits the cold water it will holds it shape. Continue until you finished with all the batter. Let it sit in that water.
8. Now in a small pot add the coconut milk, palm sugar and salt and bring to boil and remove from heat.
Serve room temperature or add some ice for a cooling dessert. Enjoy!
Fish Maw Soup (Kra-Paw Pla)
This soup is very similar to shark fin soup in texture, but it has a sweet and sour tasted that like hot and sour soup. Although, it a very popular street vendor soup, but you will not be able to find it in your Thai restaurant menu. I guess it the time consuming part and all the ingredients can be pretty costly. Even I don’t make it often, but when I do, it never fails to get lots of compliment and satisfaction from both parties. I like mine very sour and spicy. Of course, I tried many versions and after much experimenting I find that this is the most tasteful one thus far. Great for that cold winter day where you need a good soup to comfort your taste bud and soul.
Ingredients:
1 Small chicken (cook, save the broth and pull the meat into shredded pieces)
5 Dried shitake mushrooms (soak in hot water for 1 hours or so, cut into thin slices)
1 Package of dried dish maw (soak in warm water until soften then cut into small bite size)
1 Cup bamboo shoots
1 Cup of slice Jacama (adding this gives it a nice crunchy texture)
1 Can quail eggs
½ Cup vinegar
3 Tbsp of corn starch add about 3 tbsp of water to it
1 Tbsp of soy sauce
2 Tbsp of fish sauce
3 Tbsp of sweet soy sauce
1 Tsp of white pepper
1 Bunch of cilantro cut into 1’ section
1 Tbsp of sugar
6 Cup of chicken broth
1 Scope or cube of chicken flavor soup base
Topping sauce
1 Tbsp of rice vinegar
1 Soy sauce
Fresh ground chili paste to taste
Methods:
1. In a medium pot pour about 7 cups of water, chicken soup base in with the chicken. Bring to boil and shimmer it for at least an hours or so for better flavoring.
2. When it fully cooked remove the chicken and strain the broth to remove all fat and scum.
3. Then pull the chicken meat into shredded pieces and set aside.
4. Now to prepare the fish maw, after it soaked, boil it for 5 minutes removed and cut into small pieces. This is optional, but in doing this it remove the smell and soften it further.
5. In a medium pot, pour the chicken broth, fish maw, mushroom, soy sauce, sweet soy, fish sauce, sugar, vinegar, bamboo shoots quail eggs and sliced jacama and bring to boil.
6. Now slowly add the liquid corn starch and let it boil and thicken.
7. Turn off and add the white pepper and cilantro.
Serve hot with or with it topping sauce and chili sauce.
Chinese Beef Stew
Sunday, January 23, 2011
If you’re looking good home cooking beef stew for this cold winter months, look no farther for here a recipe that promise to warm you up. Nothing beats a good bowl of stew for comfort in such a dreary cold winter season. I love that the spices in this stew give this traditional beef stew a “kick” as often called by my husband. There not much to this recipe, except that it does required some time to cook it. Once it done, the beef and carrot just melts in your mouth. Excellent source of nutrients and flavorful favorite! Goes great with rice or noodle too.
Ingredients:
1 Pound of beef stew chunk cut into 2 inches cube
1 Pound of beef small intestine clean and cut into 2 inches length (optional)
6 Carrot cut into 2 inches length
½ Tsp of five spices
2 Tbsp of rice cooking wine
1 Tsp of black pepper
1 Tsp of white pepper
½ Tsp of kosher salt
½ Tbsp of dark soy sauce
2-4 Tbsp of soy sauce or to taste
2 Star anises
2 Tsp of brown sugar
4-6 Cup plus 4 Tbsp of water
Methods:
1. In a medium pot heat to hot then add the brown sugar and 4 Tbsp of water and stir in the wine, salt, soy sauce, dark soy, peppers, star anises, and five spices. Stir until it mixed well.
2. Add the beef and small intestine, stir for a couple of minutes or until it brown.
3. Now add the water and bring it to boil. Once you bring it to full boiling point, lower the heat to medium and let it shimmer for a good hour plus. Depending on how tender you want your beef to be, you can shimmer it to desire tenderness.
4. Now it you want to add some carrot, the time to do it right when the beef to add. Carrot taste best when it nice and tender in stew. The plus part about putting carrots is that it actually gives the natural sweetness to your soup.
Serve hot and enjoy!
Mango Pudding
When mango season in, I often stock it up. Once because I just love mango or anything with mango in it! As long as I can remembered, I always love eat thing ripe, fragrant fruit. My favorite memories would be the taste mango’s roll up that my grandma used to make for my after school snack. And then there all those ripe mango that we often eat after every meal in place of dessert. It would be mango everyday when it in season and it would often be what I look forward to most to dinner time. That how obsession with mango and all the dessert I love to make with it. As I grew older I would tried every kind of dessert that have mango in it and attempting to make and perfecting it. This one is just plain and simple, yet so refreshing and good for you. Great to for those hot Summer day after a nice meal. Or a beautiful table display for dinner parties or get together. Great way to leave an impression!
Ingredients:
2 Ripe large mangos
1 Packet clear gelatin
½ Cup of hot water
1/3 Cup of sugar
Strawberry for garnishing
Methods:
1. Scope the mango into a blender and pulse three or four time until it fully blended.
2. In a hot heat the water to boil then add the gelatin. Stir quickly until it fully dissolved.
3. Now add the sugar and mango and stir until fully blend.
4. Pour into desire mold or cup.
5. Let it sit in the refrigerator for an hour or so.
6. When it harden remove and garnish with strawberry.
Serve cold.
Subscribe to:
Posts (Atom)
Taste Of Spice Copyright © 2009 Designed by Ipietoon Blogger Template for Bie Blogger Template Vector by DaPino