Taiwanese Beef Noodle Soup

Thursday, July 28, 2011


As I mention earlier in my post, we don’t really have a real Asian market here. The closest one would be in Dallas about 5 to 6 hours drive, so the motivation to cook can be pretty limited too. That had recently changed since our little town finally had a real Chinese/Oriental Market. I was the first to check it out! Yes, that how excited I was. So as I was grabbing everything to put into my basket, I made my way to the cooler section and noticed the Taiwanese noodle. I nearly jumped for joy! I knew right away that I will make it this coming Sunday.
In all honestly, I never had this since I moved to Texas 5 years ago and just thinking about it made my mouth water. The blend of spices with the hot soup and oh so tender beef just compliments the chewy hands pulled noodle to perfection. This noodle soup is so soothing and delicious that it hard to any other noodle to compete with. It one of those noodle that once you have it, you’ll crave for more and more.

3 Pounds of beef shank cut into 2” inches pieces
5-6 Garlic cloves, slightly crushed
1 Tbsp vegetable oil
1 Tbsp sesame oil
3 Sliced gingers
5 Slightly crushed scallion, cut halved crosswise
1 Tsp Chinese five-spice powder
4 Star anise
½ Tsp of white pepper
1 Tbsp of beef soup base
½ Tsp of black pepper
1 Tsp of sea salt
4 Dried chilies
¼ Cup chile bean sauce
3 Tbsp of Shaoxing rice wine
2 Tbsp of rock sugar
½ Cup of soy sauce
3 Tbsp of dark soy sauce (add more for darker broth)
5 plus Quart of water

1 Bunch water crest or baby bok choy, broccoli flower
2 Package fresh hand pull Taiwanese noodle (find it in your Asian market)

1. Put all the ingredients together and bring to a hard boil.
2. Remove any scum on the top to make the soup clear.
3. Lower the heat to medium and cook for another 1 ½ hours or until beef shank is tender. If you put tendon in there cook the tendon ½ first.
4. When it done do not cover and let it sit for a couple of hours to fully absorb the flavor. Or make it overnight and refrigerated.
5. To serve, in another pot add water to almost full and bring it to boil. Cook noodle to package instruction.
6. Drain and add the vegetable and soup.

Enjoy.

My Steam Chinese Sponge Cake Dan Gao

Sunday, July 24, 2011


This steam Dan Gao or sponge cake is often present itself during the Chinese New Year festival with a red dot on the center. It always the first item I want to eat before anything else. I can’t put my finger on it, but it has a uniqueness that only childhood memories could make you appreciated this cake even more so. It not like your average baked sponge cake. It one more dense and less airy, yet it have it own distinctive taste that just melts in your mouth. I can really eat this cake all day long! Of course it being steam is doesn’t make it less fat content, even though it tasted lighter. Everything is moderation is always best.
Beside the paper cup sponge cake, this is one of my favorite cakes that I often buy when I do happen to go to Hong Kong bakery in Torrance. They make this cake nice and moist and right out of the steamer every time I order them. If you really want to try this out, I know that some Dim Sum place do serve this tasty treat. So next time if you do see it, don’t hesitate to try some!

Ingredients:
3 Cup of cake flour
½ Tsp of baking powder
½ Tsp of almond extract or prefer flavor
½ Tsp of butter/vanilla emulsion
6eggs
1 Cup of granulated sugar
Methods:

1 Put half of water in the steamer and bring to a slow boil.
2 Shift the flour and baking powder together and set aside.
3 In a mixer whip the egg until creamy and then add the sugar, butter/vanilla emulsion and almond extract.
4 When the egg turns pale yellow and double in volume. Slowly add the flower and mix well.
5 Pour the batter into a grease baking pan of desire size and put over hot boiling steamer.
6 Steam for 45 minutes or until the pick comes out clean when poke in the center.

Let cool and serve plain or with fruit topping.

Chendol

Sunday, July 17, 2011


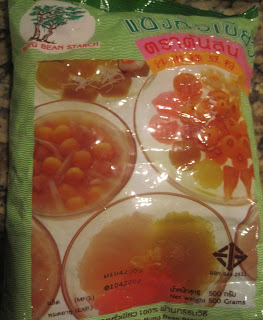
I been looking for the recipe for some time now. Chendol is another form of Lod Chong, just a slight difference in texture and much chewier. There are many name for it, but the one I am familiar with is the Thai’s version known as Singapore Lod Chong, using topical starch or mung bean starch instead of the regular rice flour with lime stone water. In Cambodian lotus root starch is their main ingredient. I know that Vietnamese have the same dessert that they put in their rainbow color drink, and I am assuming that they used tropical starch due to it super chewy, clear texture. In all, I think this dessert is awesome in each and every form. I just love the chewy texture combination with creamy coconut flavor that sweet and salty. It just hits the spot for my sweet tooth craving every single time. This refreshing sweetness it great on serve on shave ice, in a coconut milk drink or just alone with drench in coconut milk syrup, you’ll never just have one serving!
Here what I found out after many experiments with the different kind of starch:
Mung bean starch makes it more bouncy and less chewy.
Lotus root starch soft and chewy, almost melt in your melt texture.
Topical starch is very chewy and almost little or no bounce. Have to chew long before digesting.


Ingredients:
1 Cup starch
3 cup water for lotus starch and 3 ½ cup water for the mung bean flour
1 to 2 drops of pandans extract for flavoring and green coloring

Coconut Milk Syrup
1 Can coconut milk
¾ Cup of palm sugar
½ Tsp of salt
Over medium heat add everything and bring to boil. Add the sugar a little at a time taste. Turn off and set aside.

Methods:
1. Mix the water and the flour until blended.
2. Heat over medium heat and stir constantly.
3. When it starting to clump up, lower the heat to low and continue stirring in one direction to keep the consistency going.
4. It is done when it is sticky, shiny and clear. That about a good 15 minutes of stirring.
5. Remove from heat and pour into the lod chong presser. Making sure that the presser is only ½ above ice water.
6. Let it sit in the water for a good 10 minutes then remove and serve with the coconut milk, with or without ice.

Taste Of Spice Copyright © 2009 Designed by Ipietoon Blogger Template for Bie Blogger Template Vector by DaPino